
2 December 2020
How to Sketch Your Science
Posted by Shane Hanlon
Disclaimer: This article serves as the main hub for the Sketch Your Science Workshop at AGU20. The best part? This also serves as a standalone resource for those of you who are unable to attend! Find some amazing sketches here. By MJ Riches & Irene Crisologo

We’re excited to join you in the world of #SciArt! Credit: Irene Crisologo
“Sketch” implies an unpolished piece of work- something recognizable, good enough to share, but that doesn’t require the hours of patience to make it perfect. There’s a reason that we encourage you to #SketchYourScience- it doesn’t need to be perfect, it needs only be done.
Why sketch your science? To share your science. Forwarding folks links to your publications is a viable strategy to get your work out there, but a visual is more stimulating. It offers a more intimate look at the work and fosters a connection with the author/artist. Due to the limitations in content, it also distills your work into more palatable bits that are appropriate for a wider audience.
However, there are also plenty of reasons why someone may shy away from sketching their science. Three in particular come to mind: having nothing to share, the fear of failure, and not knowing how.
Nothing to Share?
If it’s important enough that you spend your time on it, it’s important enough to share. If you’re struggling to find something, take a look through these prompts:
- Sketch your research question
- Sketch one of the key points from your introduction
- Sketch one key finding
- Sketch your fieldwork setup
- Sketch what you get asked about most in your research
- Sketch something you heard in a seminar
- Sketch the topic of your research (e.g., plant, soil, volcanoes, clouds)
- Sketch the figure you wish you saw when first learning your topic
- Sketch a common misconception from your field
Your audience will determine the level of contextual detail that can be palatable. The scope will determine the amount of content you can include in your sketch. You can always start simple (e.g., general audience and one takeaway point) and work your way up.
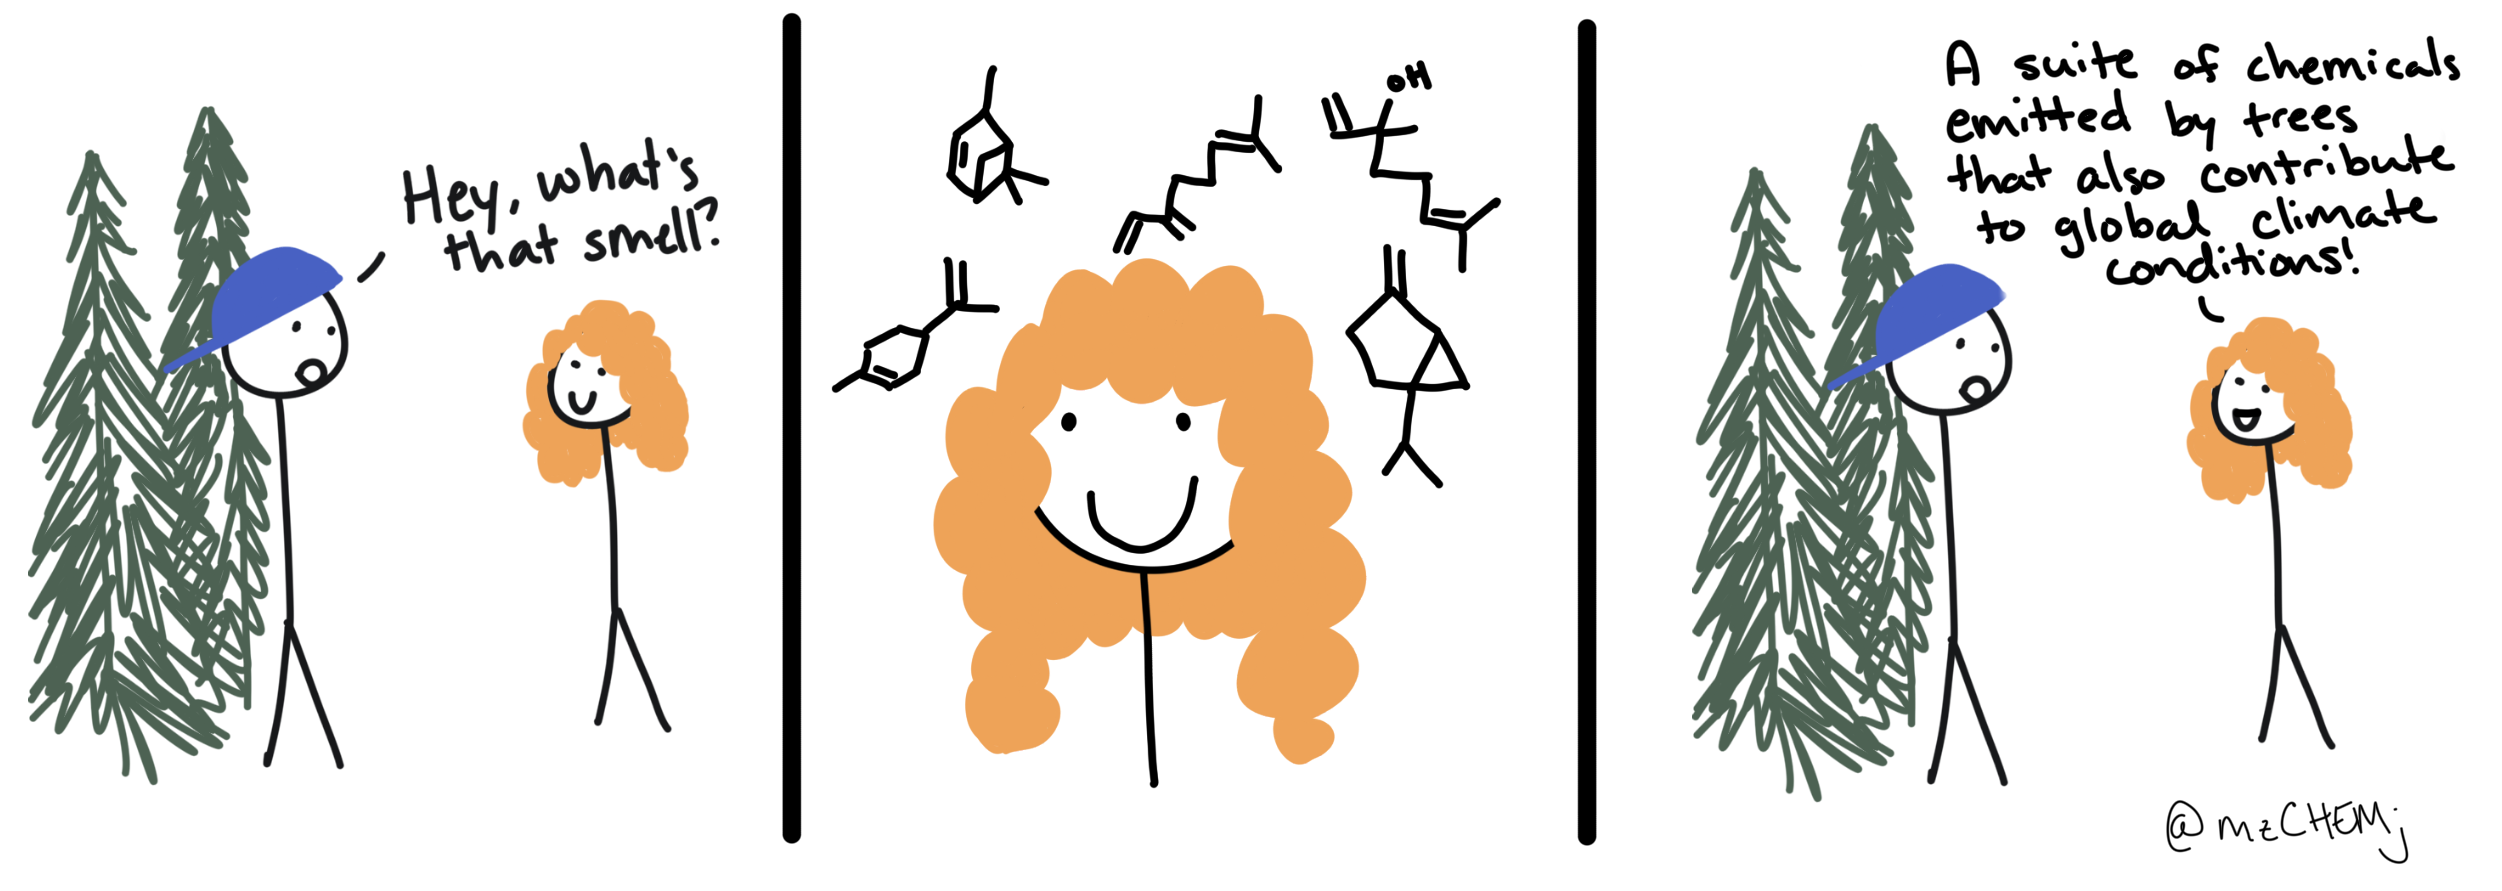
Even a work with one key point for a general audience is worth sharing. Credit: Mj Riches
Fear of Failure?
There is a common misconception that art has to be technically perfect to be worth sharing. In reality, joy and information can be gained from any level of art. Whether it’s watercolor paintings or stick figures, if there’s a message, then it’s worth sharing.
An important part of the process, though, is practice. Practice increases your artistic skills, but it also gets you more comfortable with sharing your work. Surround yourself with science artists of various skill levels who also post their science art (search the hashtag #SciArt or #SketchYourScience on most social media sites). When you share your sketches, don’t expect it to be perfect, and don’t be deterred if you don’t get the level of engagement you wanted. Continue to build upon your experiences and continue sharing. It’s through the feedback that you get back that helps build both your skill and your confidence!
Where to Start?
Without formal training, starting to draw can seem like a daunting task, but there are two secrets to sketching:
- Everything is made of shapes
- Shapes are made of points and lines
Everything else is icing on the cake.

Combining basic shapes, you can create just about anything. Even complicated shapes are just points and lines. Credit: Mj Riches
Microsoft Powerpoint can be used to sketch your science. So pick your message and sketch those shapes!
Bringing Your Sketches to Life
Sometimes, you may want to show movement in your sketches. In still sketches, this can be achieved by putting arrows, to signify the direction of movement of an element in your drawing. A fun alternative to this would be to bring it to life by animating it.
An animation is essentially a sequence of still images that show slight changes. Now that you have your sketch, the next step to animating it would be to replicate that sketch, but with an element of the sketch slightly moved (i.e. a hand waving, a wave propagating, a plant growing). Each modified sketch is then considered a frame in the animation. To make a longer animation, more frames are created. It may sound a bit tedious, but it doesn’t have to be! You can create an animation with just a few frames.
1. Making the frames
-
- Analog – Pen and paper
Did you ever doodle on the corners of your notebook to make a flip animation? (Please don’t let it be just me!) The process of making these doodles—drawing one frame at a time, and seeing it come to life by flipping the pages—embodies what an animation is: a series of still images shown one after another.
-
- Digital
If/when you run out of notebook corners or just prefer to go paperless with your sketches, there are plenty of digital options as well. You can draw your frames using the good old Microsoft Paint, Photoshop or Gimp, or even Microsoft Powerpoint. Remember, you just need to have a few still images to make a short animation.
Here’s an example of an animation made up of just these 5 frames:

2. Putting them together
Analog
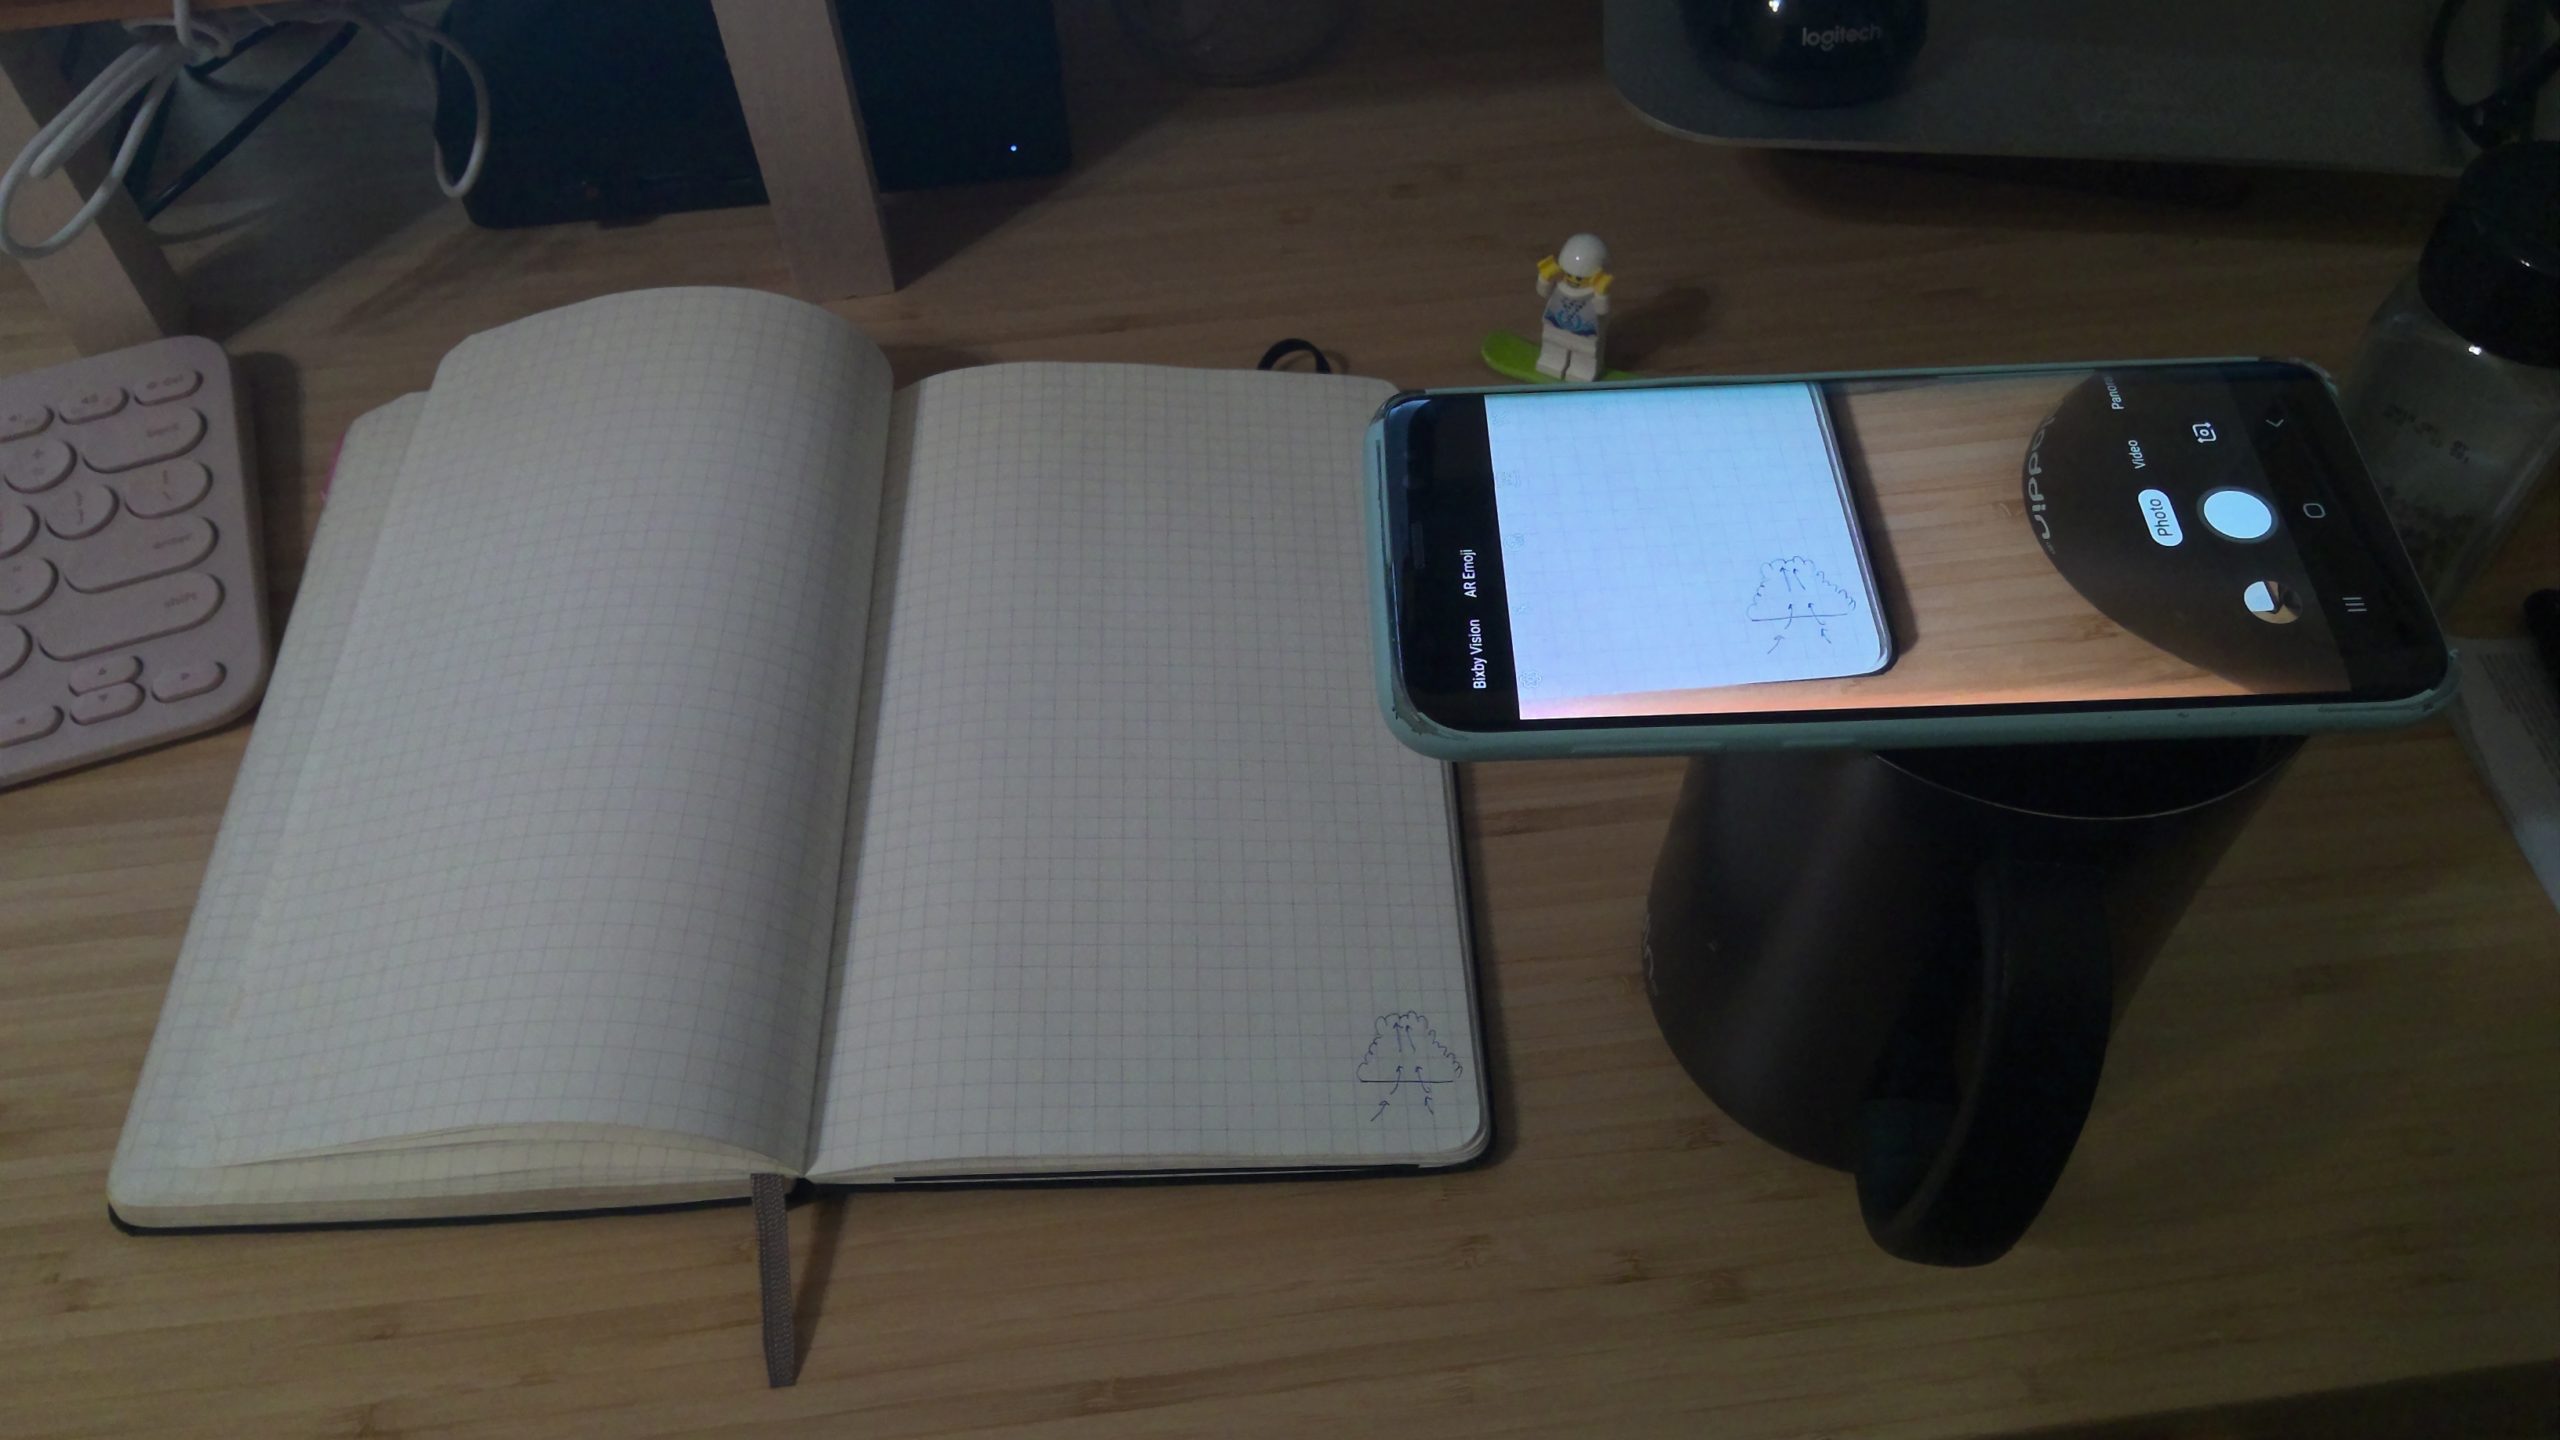
Flipping the pages gives you an audience of one (or two). If you want to share your animation to a bigger audience, going somewhat digital is a necessity. Just take a picture of each page, ideally with a steady camera (check out my ultra low-cost setup below). Then using a photo editing software (like Photoshop or Gimp), you can open each image as layers and export them as an animated GIF.
Here’s a step-by-step walkthrough:
Step 1: Take pictures of your drawings and transfer them to your computer.
Step 2: Using your photo editing software of choice (in my case it’s Gimp, because FREE), open the photos as layers:
- File → Open as Layers…
- Select your photos
- Open
You should see your still frames in the layers panel, in sequence, with the first photo as the bottom layer.
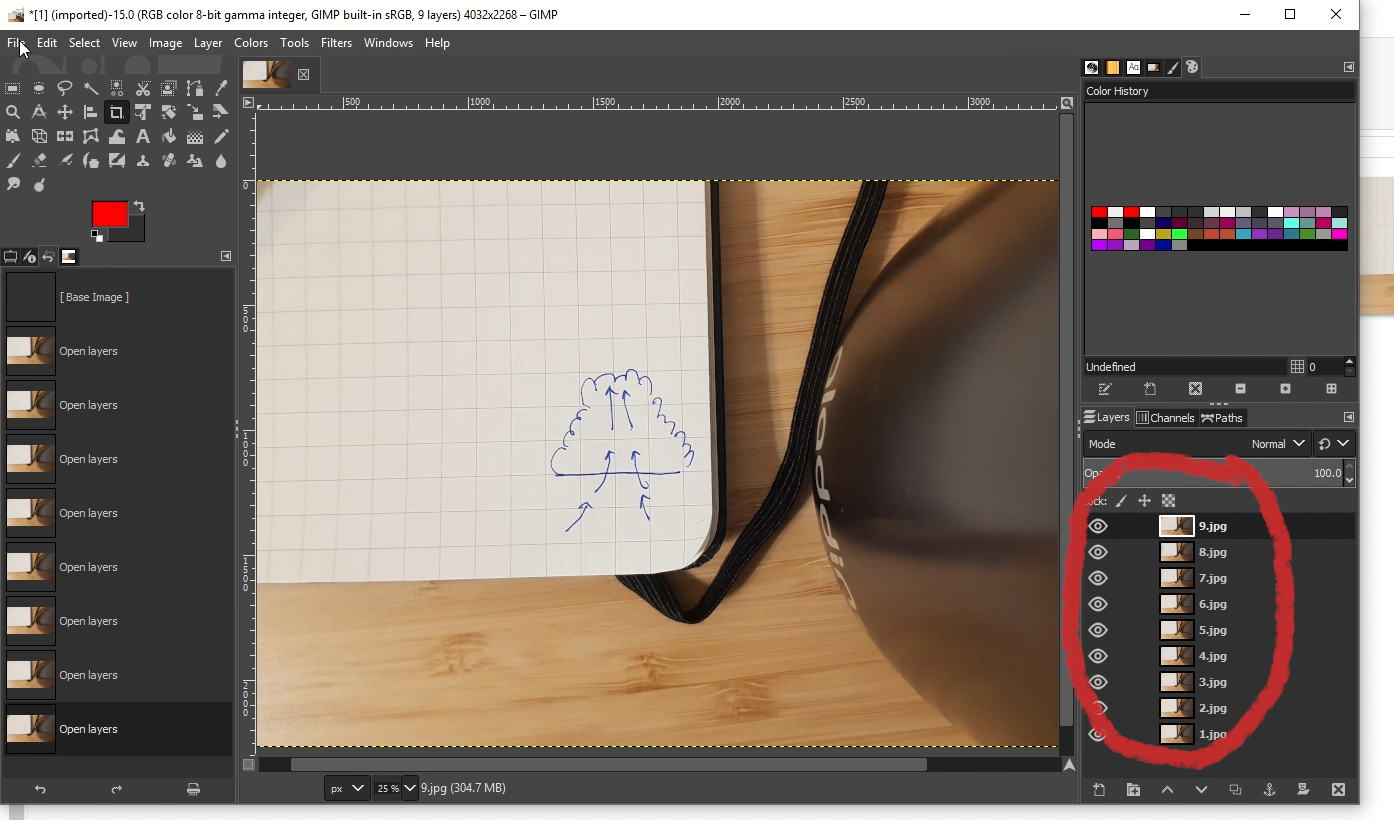
Here you can edit your photos, crop them, draw even more on top of them, anything you like!
Step 3: Once you are happy with the frames, you can now export them as an animated GIF.
To do this:
- File → Export As…
- Name your file
- Select File Type (By Extension) → GIF Image
- Export
Step 4: After you click Export, an options box will appear. Make sure to check “As animation” if you want your GIF to be animated. You can also select the frame interval (in this case I set it to 150 milliseconds). Then finally click Export to save your file.
Step 5: TADAAA! Now you have an animated GIF of your science sketch!
Step 6: Share it! Don’t forget to use the #SketchYourScience hashtag!
If you prefer working with Adobe Photoshop, here’s a similar walkthrough showing how to create an animated GIF from a sequence of images:
https://helpx.adobe.com/photoshop/how-to/make-animated-gif.html
Digital
If you have a touchscreen device (tablet, phone) or a pen tablet or if you are confident with your mouse skills, you can also sketch digitally. Any software that allows you to draw (make lines and shapes) can be used. Yes, even Powerpoint!
If you choose Gimp or Photoshop, you can draw each frame in separate layers, or even make use of multiple layers to make one frame. Once you have your frames, you can put them together as a GIF following the steps mentioned above.
If you choose to sketch using Powerpoint, you can sketch your shapes on each slide, applying the slight change on the element you want to animate. You have the option to draw freehand, or simply use the shapes, arrows, and other elements available.
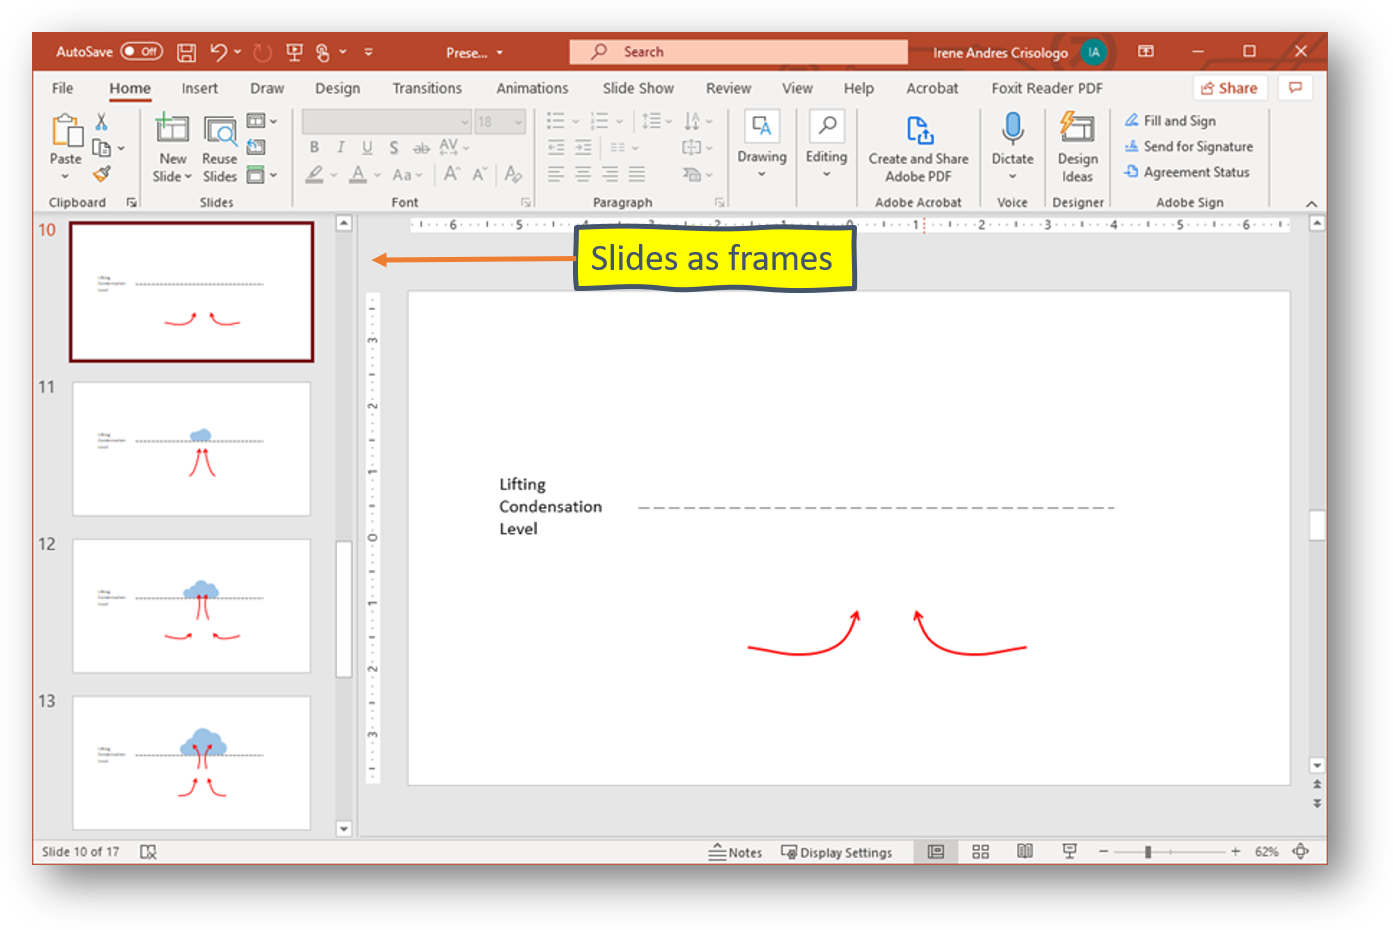
You can preview your animation by presenting as a slideshow and going back and forth on the slides. Once you have all the frames you want to include, you are ready to export it as an animated GIF!
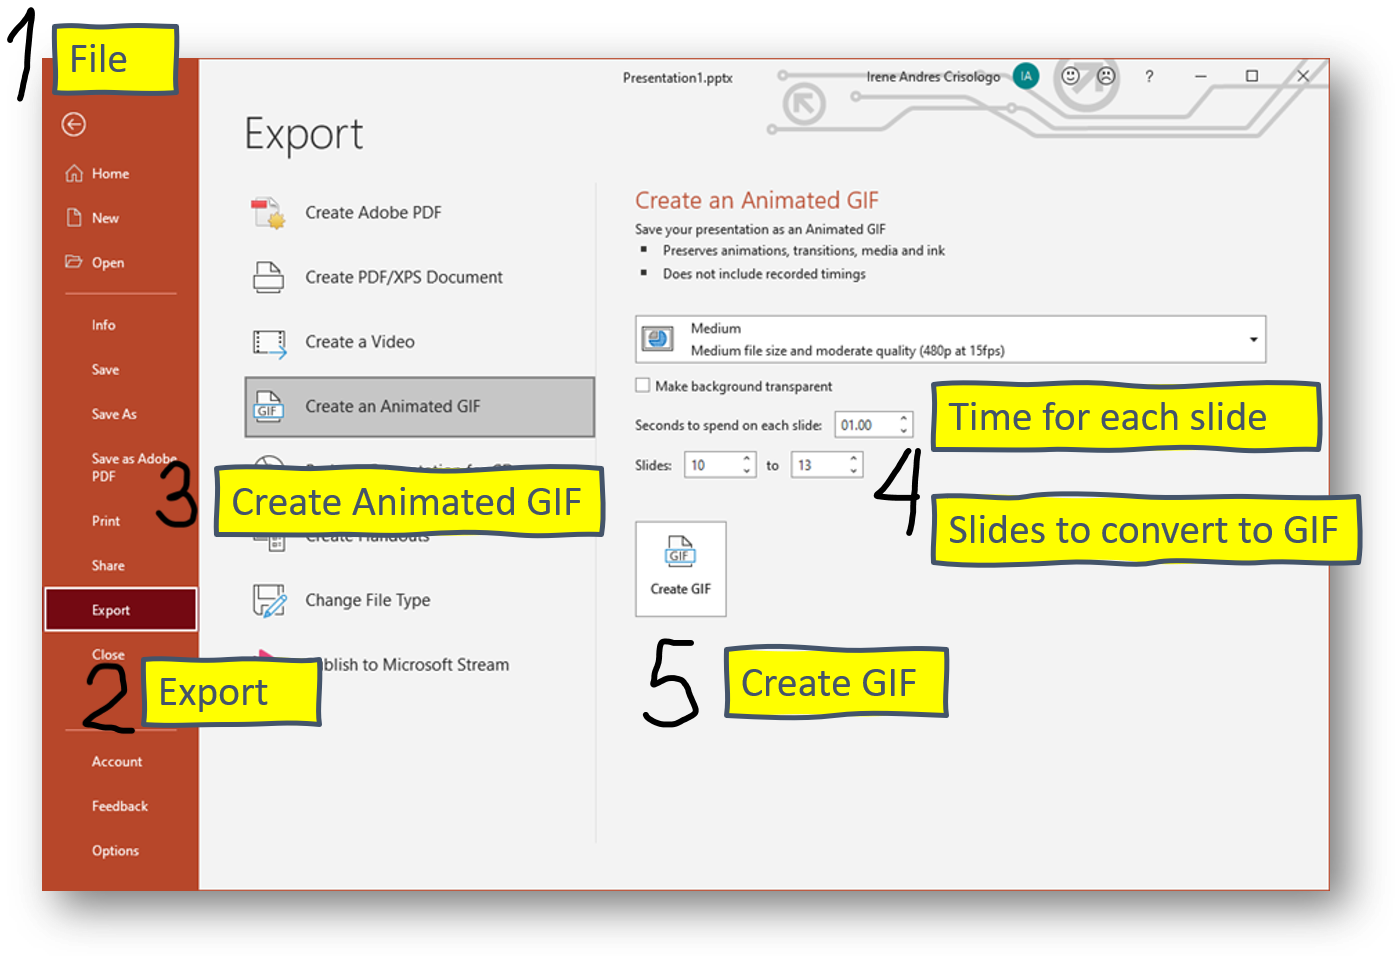
Here’s the end result of the 4 slides in the example:
Resources:
- Choosing Colors: Color Brewer and Color Oracle for colorblind accessibility, Coolors and SciVisColor for creating a palette
- Finding Inspiration: Information is Beautiful, AGU’s #DrawnToGeoscience, AGU’s Tumblr Page
- Free Sketching Software: Gimp (desktop), Inkscape (desktop), Autodesk Sketchbook (desktop & mobile), Infinite Painter (mobile, some paid features), Microsoft Paint
- Paid Sketching Software: Adobe Illustrator, Adobe Photoshop, Procreate (iOS mobile), Microsoft Powerpoint
- Free Animation Software: Flipaclip (iOS, Android, some paid features), Autodesk Flipbook (desktop)
- Other resources: Adding Diversity to your Sketches
-This workshop is brought to you by Irene Crisologo (video intro), a Post-Doc at Northwestern University, and Mj Riches (video intro), a PhD candidate at Colorado State University. The two are Voices for Science 2020 advocates. Find them on Twitter @IreneCrisologo and @mzCHEMj.
 The Plainspoken Scientist is the science communication blog of AGU’s Sharing Science program. With this blog, we wish to showcase creative and effective science communication via multiple mediums and modes.